Creating a Case
The creation of cases is the responsibility of the relevant faculty Dean (or a member of their staff). The typical time frame for cases is as follows:
| wdt_ID | Type of Case | Applies To | Time Frame |
|---|---|---|---|
| 1 | First year reappointment | Professorial faculty | Spring of 1st year of employment |
| 2 | First year reappointment | Lecturers | Spring of 2nd year of employment |
| 3 | Regular fall reappointment | All faculty | Fall |
| 4 | Third year review | Professorial faculty | Spring of 3rd year of employment |
| 5 | Tenure | Professorial faculty | Fall of 7th year of employment |
| 6 | Tenure | CLTs | Fall of 5th year of employment |
| 7 | CCE | Lecturers | Fall of 5th year of employment |
| 8 | Promotion to Associate Professor * | Professorial faculty | Fall of 7th year of employment |
| 9 | Promotion to Professor | Professorial faculty | Spring |
| 10 | Reclassification | CLTs | Spring |
*Promotion to Associate Professor usually coincides with the application for tenure, and only one application is required. When it does not coincide with the application for tenure, promotion to Associate Professor occurs in the spring.
Instructions:
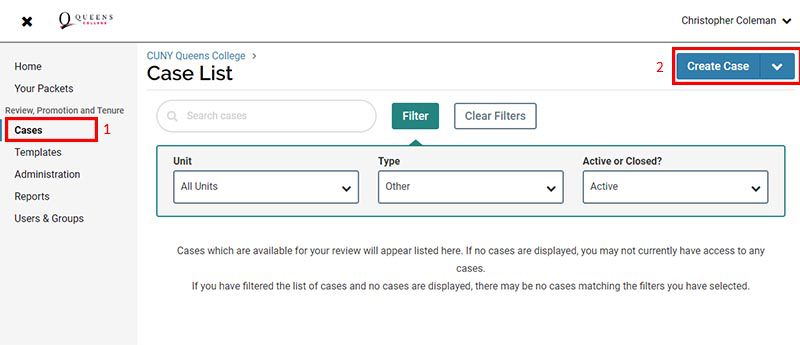
- Log in to Interfolio (see the home page for how to log in) and click Cases in the left pane.
- Click Create Case in the upper right corner. (If you are clever, you can create multiple cases, but this only makes sense if you are creating multiple cases in the same department.)
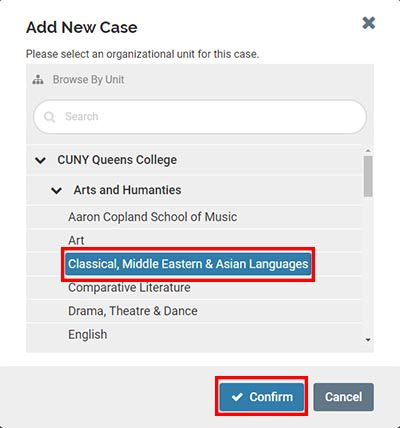
- Under the Add New Case menu, choose the appropriate academic department and hit Confirm. Do not choose your Division.
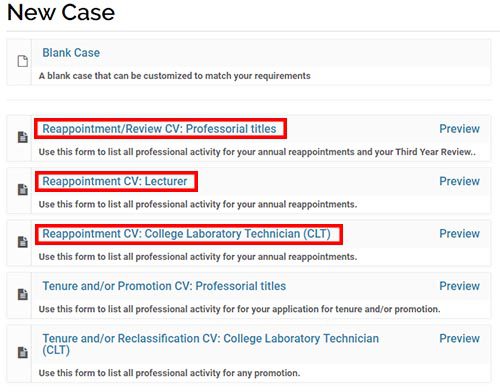
- Under New Case choose the correct Reappointment template, for Professorial titles, Lecturers, or CLTs. The process described here applies equally to all three kinds of reappointments/reviews.
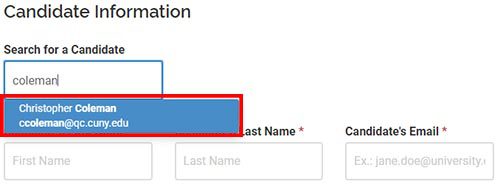
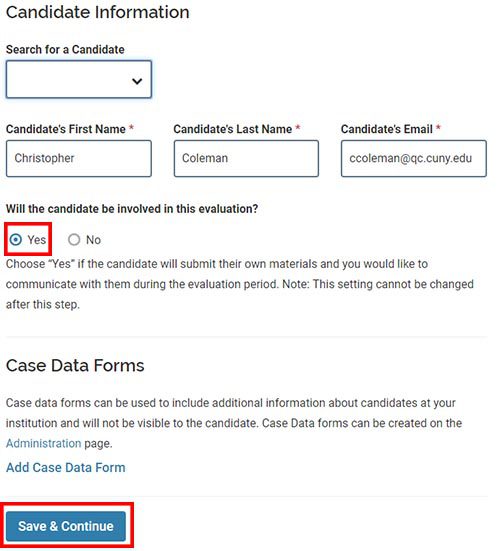
- Input the Candidate Information. Assuming they are in the system, search for the candidate. Clicking on their name will fill the boxes in automatically. If the candidate is not in the system, send an email to Chris Coleman, College Administrator for Interfolio.
- Ensure the option is selected to allow the candidate to be involved in the evaluation. It should be selected by default. Then click Save and Continue.
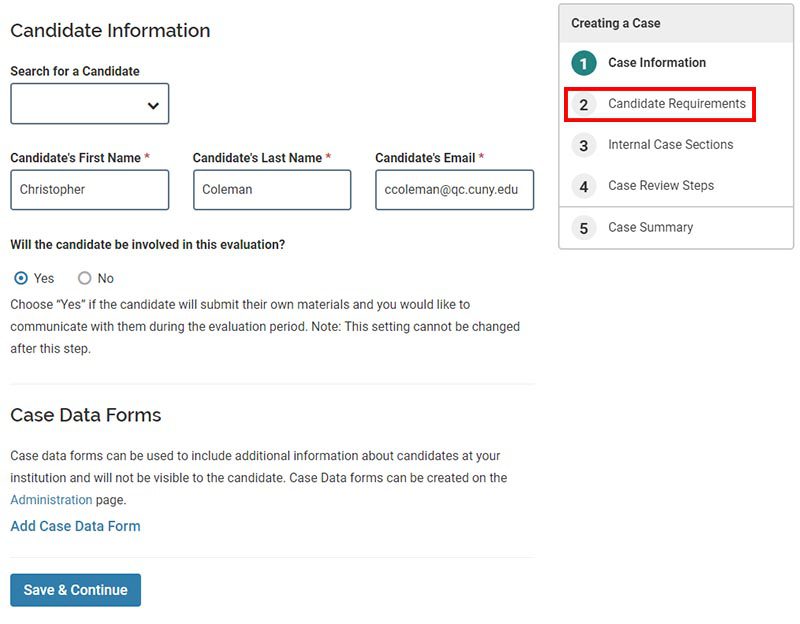
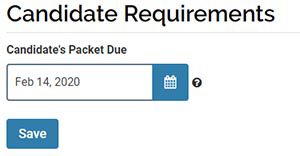
- Under Creating a Case (upper right box), click on step 2, Candidate Requirements. At the very top, insert a due date under Candidate Packet Due. Click Save.
- Under Creating a Case (upper right box), click on step 4, Case Review Steps. (You can also scroll all the way to the bottom and hit ‘Continue’ if you prefer.)
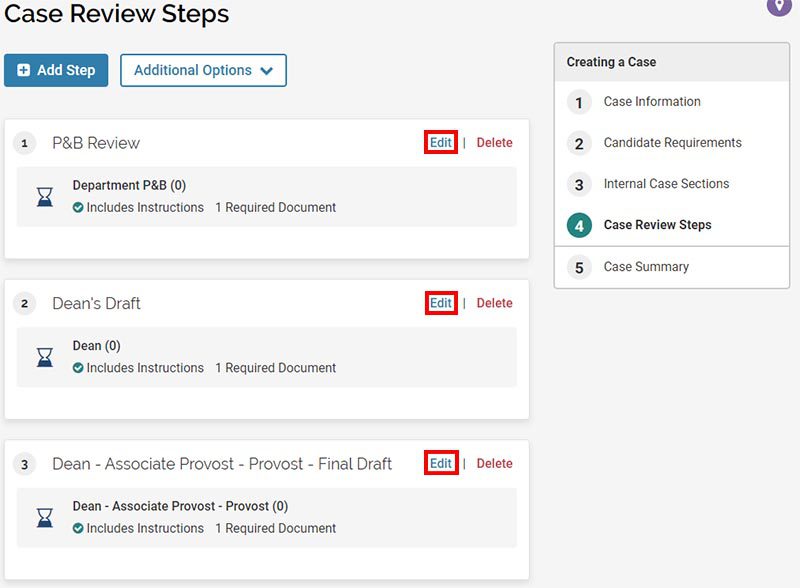
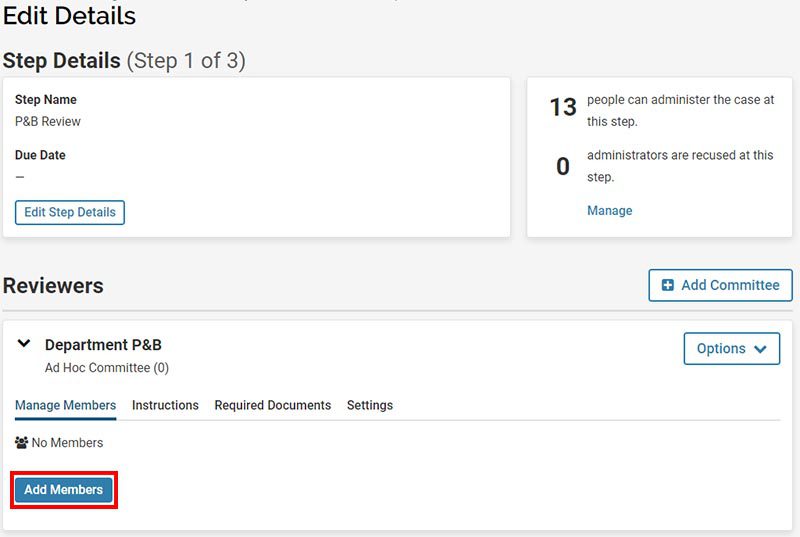
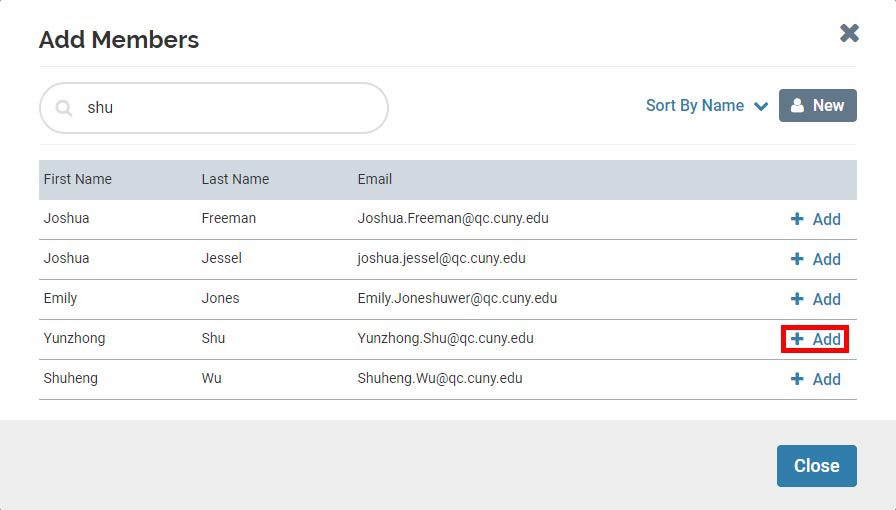
Under Case Review Steps, the list of people in each of the three steps must be added manually. The screenshots below show the steps for P&B Review, but the steps are the same for all thee steps.
- To begin, click Edit for the P&B Review. Click Add Members.
- Add the names of the department P&B, including the Chair.
- If the candidate her/himself is a member of the P&B, do not add her/his name to the list (so the P&B will list only four members).
- If the candidate her/himself is the Chair of the Department, speak with Chris Coleman (who will confer with your Dean) before moving forward.
After all the members are added, hit Close and then Return to Case Review Steps.
- Do the same thing for Dean’s Draft (usually just the name of your Dean) and for Dean – Associate Provost – Provost – Final Draft (usually the name of your Dean, the Associate Provost (currently Alicia Alvero), and the Provost (currently Elizabeth Hendrey)).
- Continue to step 5, Case Summary.
You are now done adding the specific details of the case, so hit Return to Case in the upper right corner.
- You should now update the Status of the case by selecting the correct status from the drop-down menu. This is important as it allows cases to be sorted correctly. The status should say something like 2020-21 Reappointment. This will be changed to something like 2020-21 Reappointed when the process is complete and the case is closed. Chris Coleman will be responsible for creating the correct Status headings.
Finally, and unless this is a first reappointment, it is also necessary to carry over past files into the new case. This is a somewhat lengthy but very easy process. How to do this is the subject of the next section of instructions. Please read those before sending the case to the Candidate and the P&B.
When everything is ready, under Send Case send the case to both the Candidate and the P&B.
For your reference, note the various options under Case Options. In particular, the Activity Log let’s you see any changes that have been made, when they were made, and who made them. When the reappointment process is complete, the case status will be changed (indicating whether the reappointment was successful or not) and the case closed. If you need to go back and change anything above, you can do that under Edit Case.


