Setting an Appointment using QC Navigate
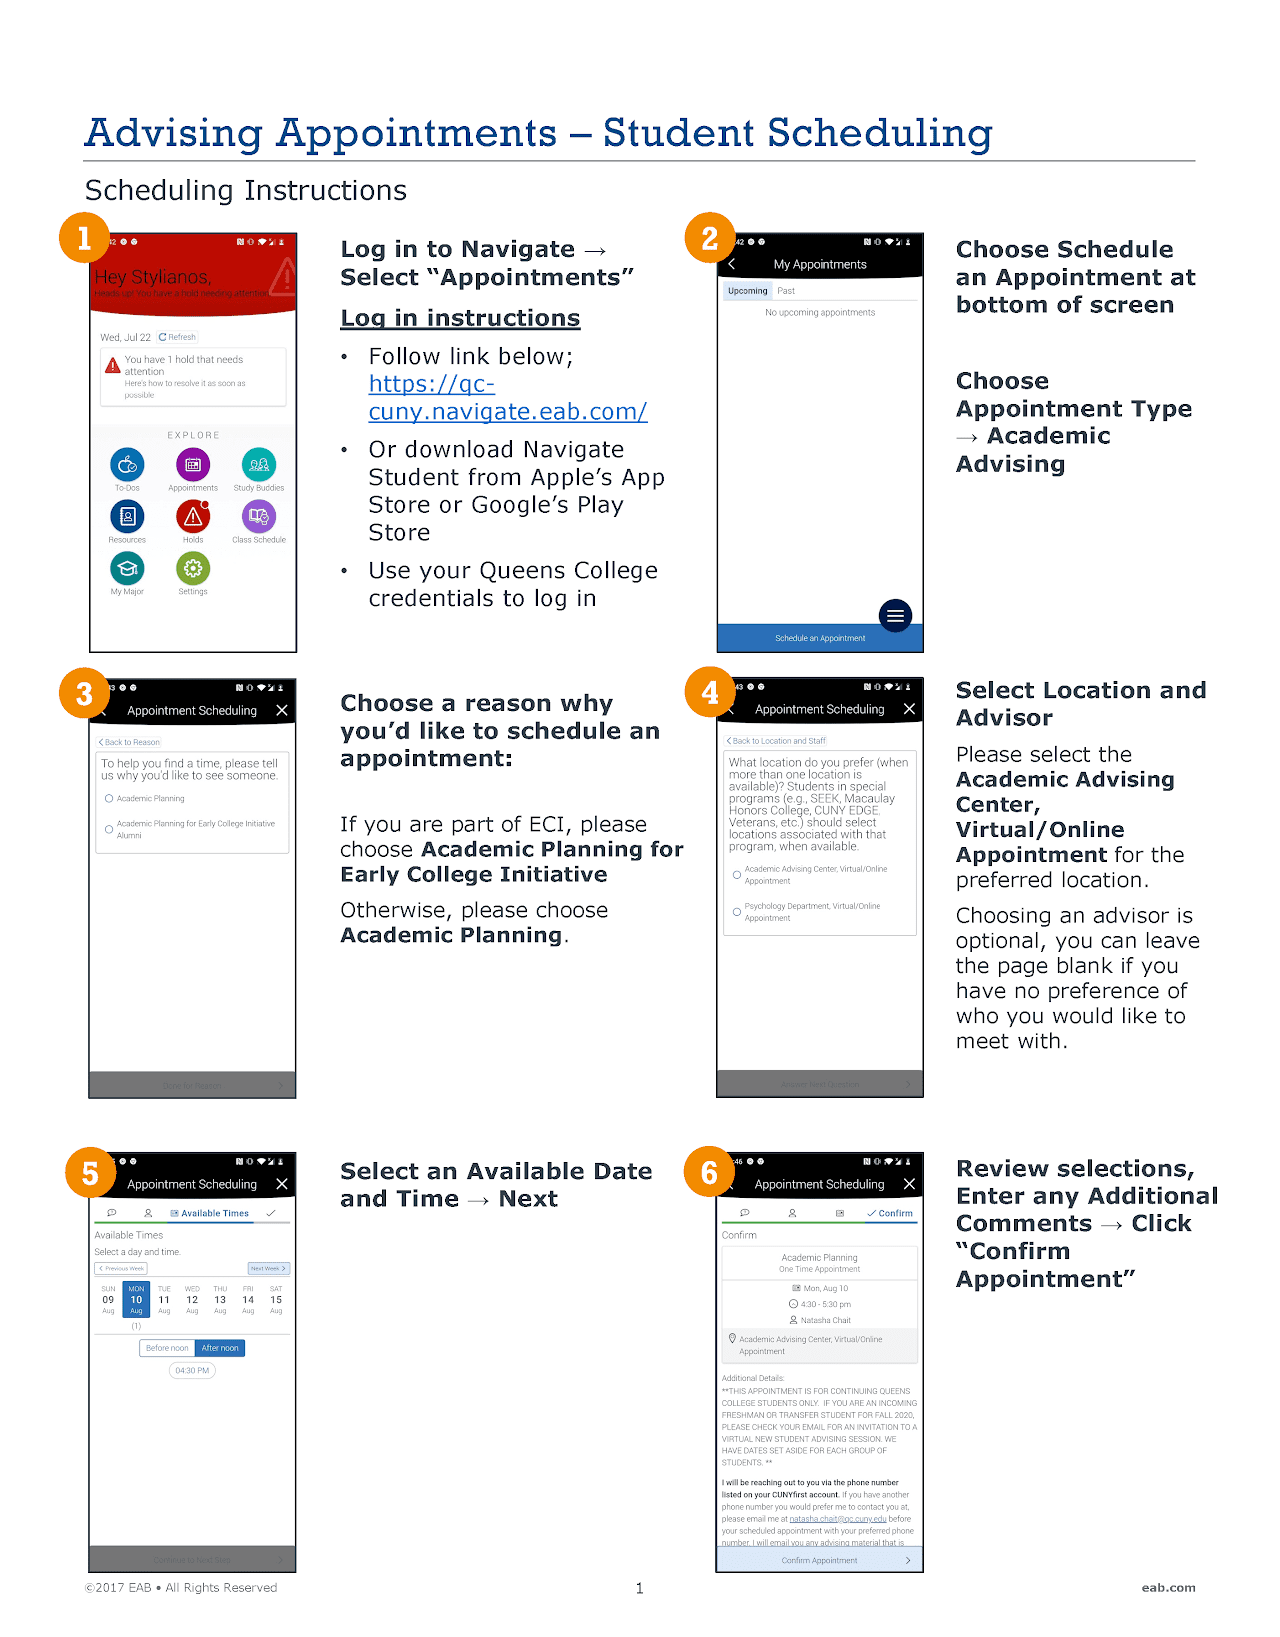
How to schedule an appointment using QC Navigate
See the list of services below to determine what area (academic advising, career advising, financial aid & resources, or academic support) to select when setting an appointment using QC Navigate.
1. Using the QC Navigate app, select the Appointments button
2. What type of appointment would you like to schedule? Choose the area for the service you are creating an appointment for (see chart below).
- Academic Advising
- Career Advising
- Financial Aid & Resources
- Academic Support
3. Please tell us why you’d like to see someone. Select the service that best matches your reason for creating the appointment.
- Note: Students in special programs must first select from among the service group available for that program, then select the specific service
4. Click Next
5. What location do you prefer? Until further notice, all appointments are remote so you will choose a virtual/online “location.” Be sure to the select the appropriate location or you will not be able to schedule.
- For major advising, select your department’s location if it exists.
- For students in special programs, select the location for that program’s services.
6. Who would you like to meet with? If you don’t have a preference, leave the selection blank. By selecting one or more individuals, you will be limiting your scheduling options to coincide with those staff members’ availabilities.
7. Select date from the available slots (blue boxes); click the right arrow to see future availabilities.
8. Once you select the date, the time options will be presented. Select the desired time from the available times.
9. Click Next to review your choices and then confirm.


